The fourth step for enabling SightCall with Microsoft Dynamics is to create a Microsoft Azure app. This app allows SightCall to retrieve and push information to the Microsoft Dynamics organization. Specifically, it gives SightCall permission to:
- Retrieve needed information from the page to put the email, phone number, and record ID in the widget when on a specific record
- Push the case report to the correct record after a call
- Push the picture to the correct record after a call
- Create a call report record after a call
In this article
Creating this app involves the following steps:
- Create an Azure Active Directory app
- Update the manifest and API permissions
- Create certificates and secrets for the app
- Grant admin consent for SightCall enterprise application
Overall process
This integration has to be configured and integrated before agents can access SightCall features from within Microsoft Dynamics. The configuration steps include (current step is bolded):
- Install or upgrade the SightCall widget
- Add the SightCall widget to the entity layout
- Locate your Microsoft Dynamics domain name and region
- Locate unique name
- (Current) Locate the client secret and client ID in an Azure app
- Locate your SightCall API key
- Register your SightCall for Microsoft package
This article walks you through locating the client secret and client ID in an Azure app.
Create an Azure Active Directory app
- Sign into the Azure Portal, https://portal.azure.com
- Select Azure Active Directory in the left navigation.
- Select App registrations in the secondary left navigation and then choose + New registration.
- Enter a name like SightCall for the app in the Name on the Register an application page.
- Under Supported account type, select either Single tenant or Multitenant:
- Single tenant: If the users are only from your Active Directory (AD), then select Accounts in this organizational directory ([YOUR ORG NAME] only - Single tenant), where [YOUR ORG NAME] is your organization name.
- Multitenant: If the users can come from outside your Active Directory, then select Accounts in any organizational directory (Any Azure AD directory - Multitenant).
- Under the Redirect URI (optional) section:
- Select Web from the drop-down.
- Enter this URI in the text box: https://microsoft.sightcall.com/api/oauth-callback
- Select Register.
Update the manifest and API permissions
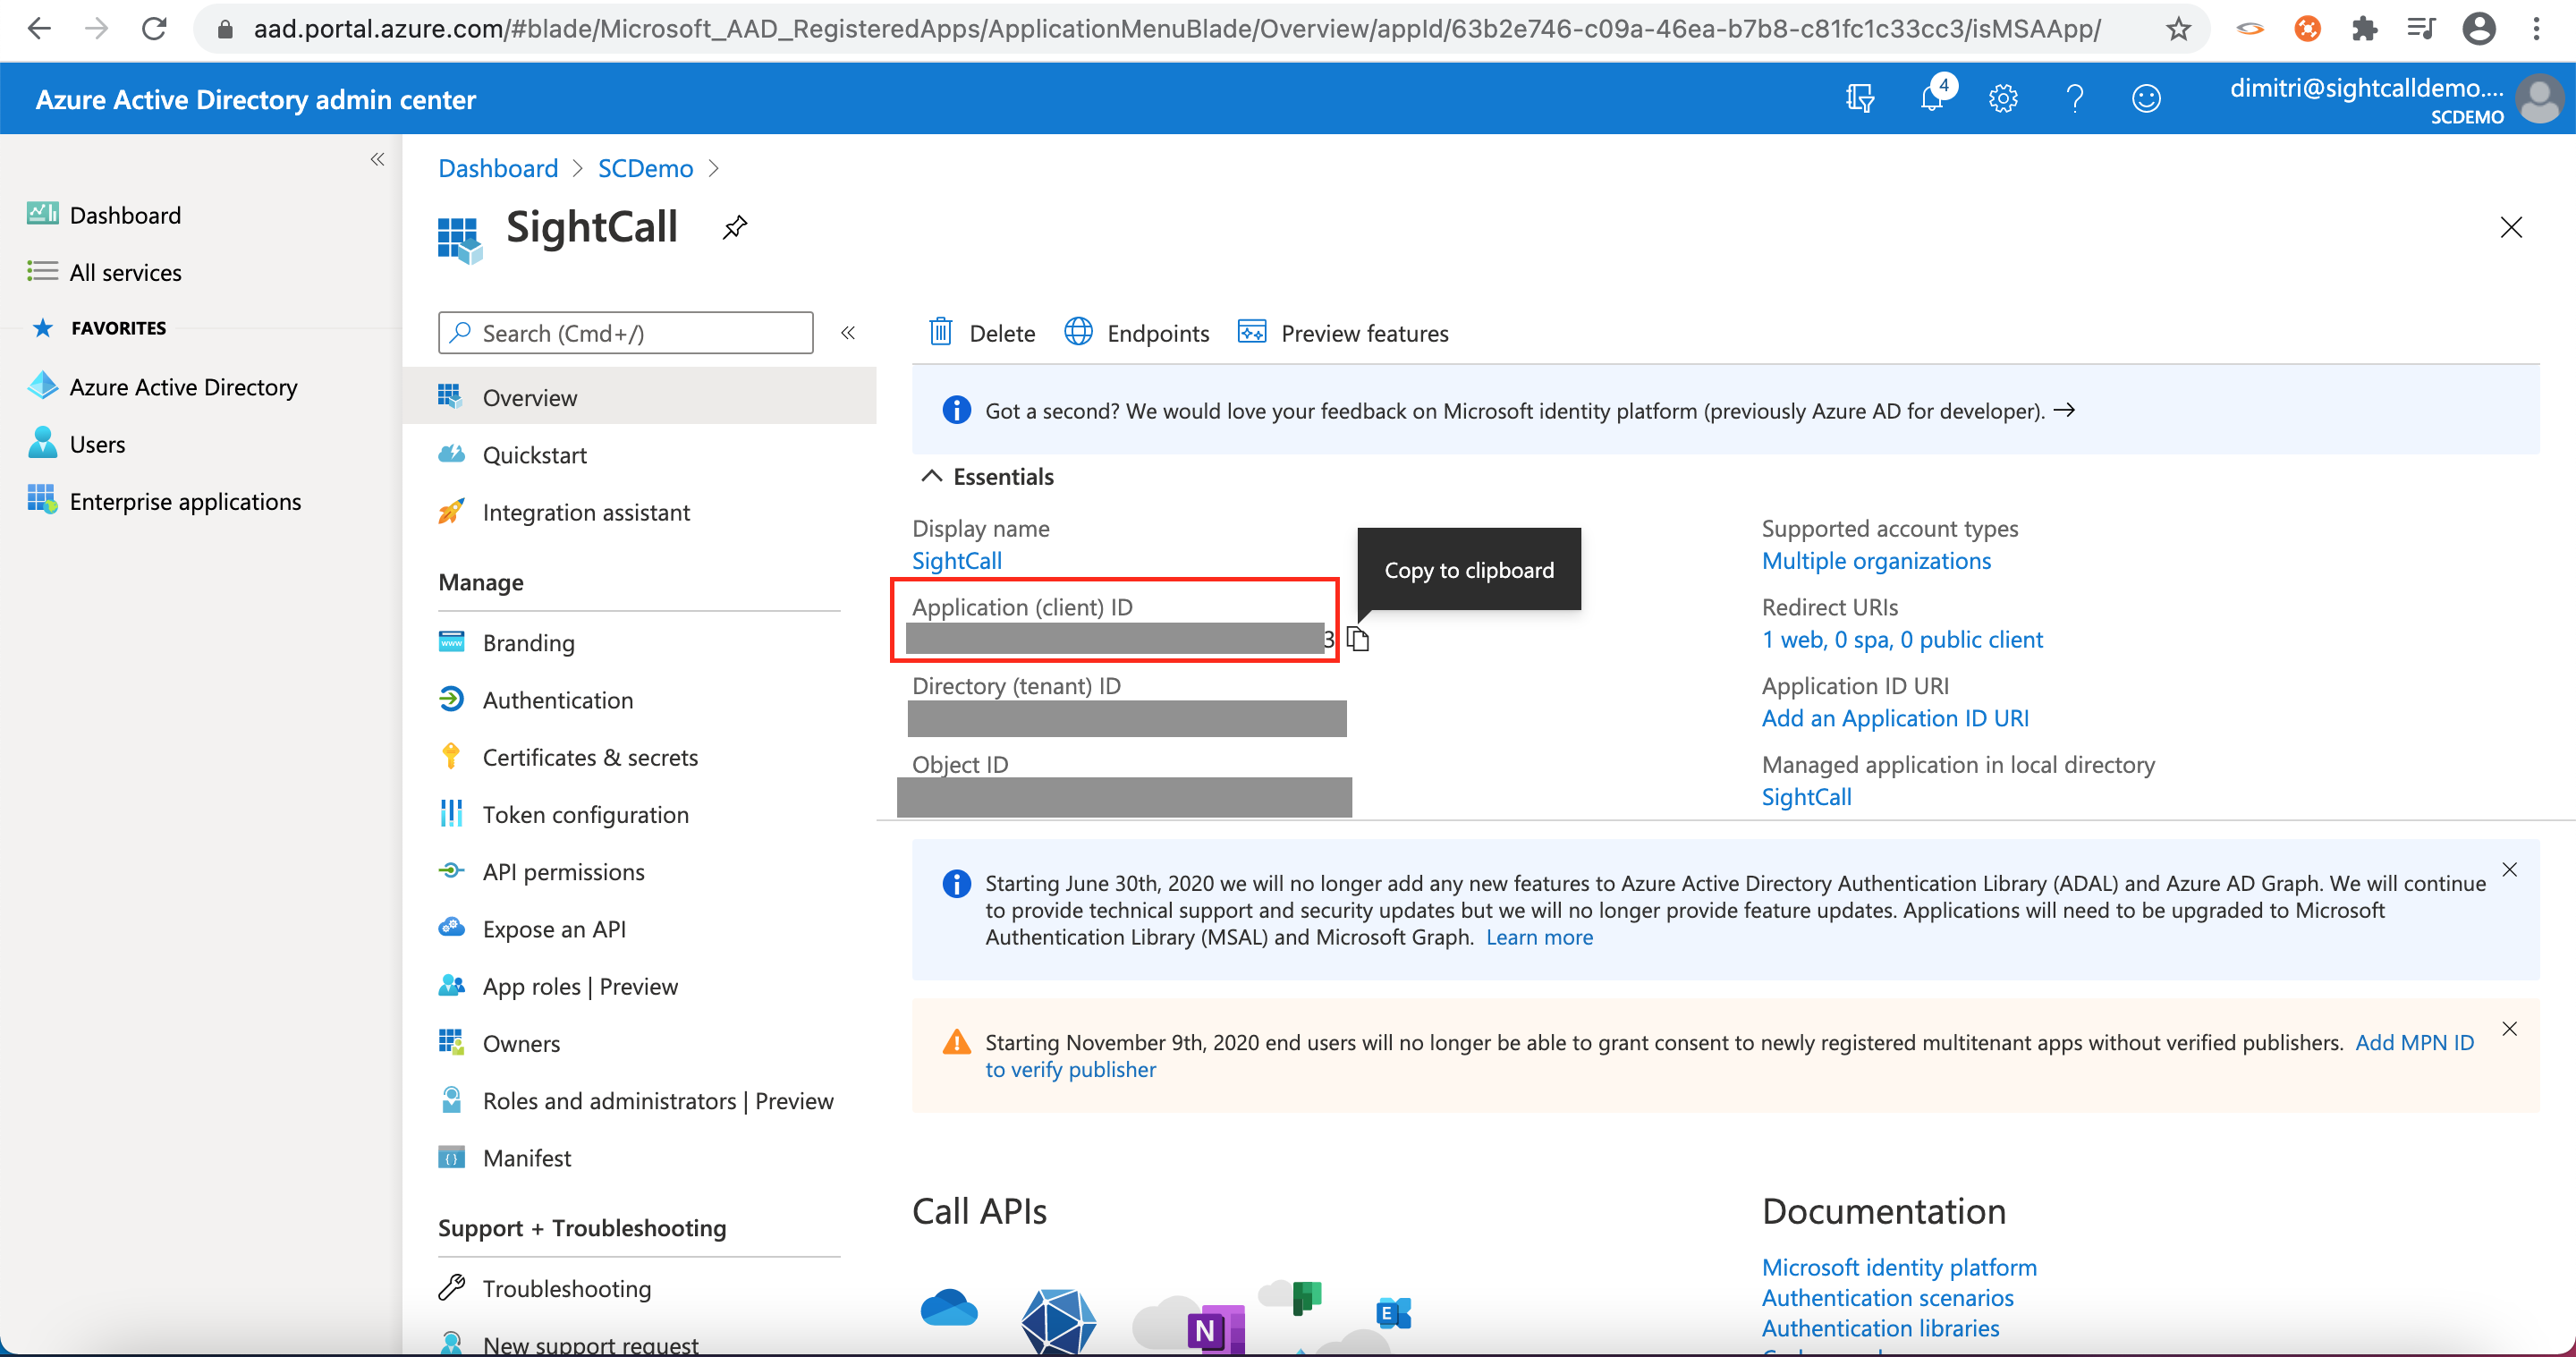
- Open the new SightCall registration by selecting Azure Active Directory > App registration. Select SightCall under Display name.
- In the Overview tab, copy the Application (client) ID. This information will be used in the SightCall activation procedure.
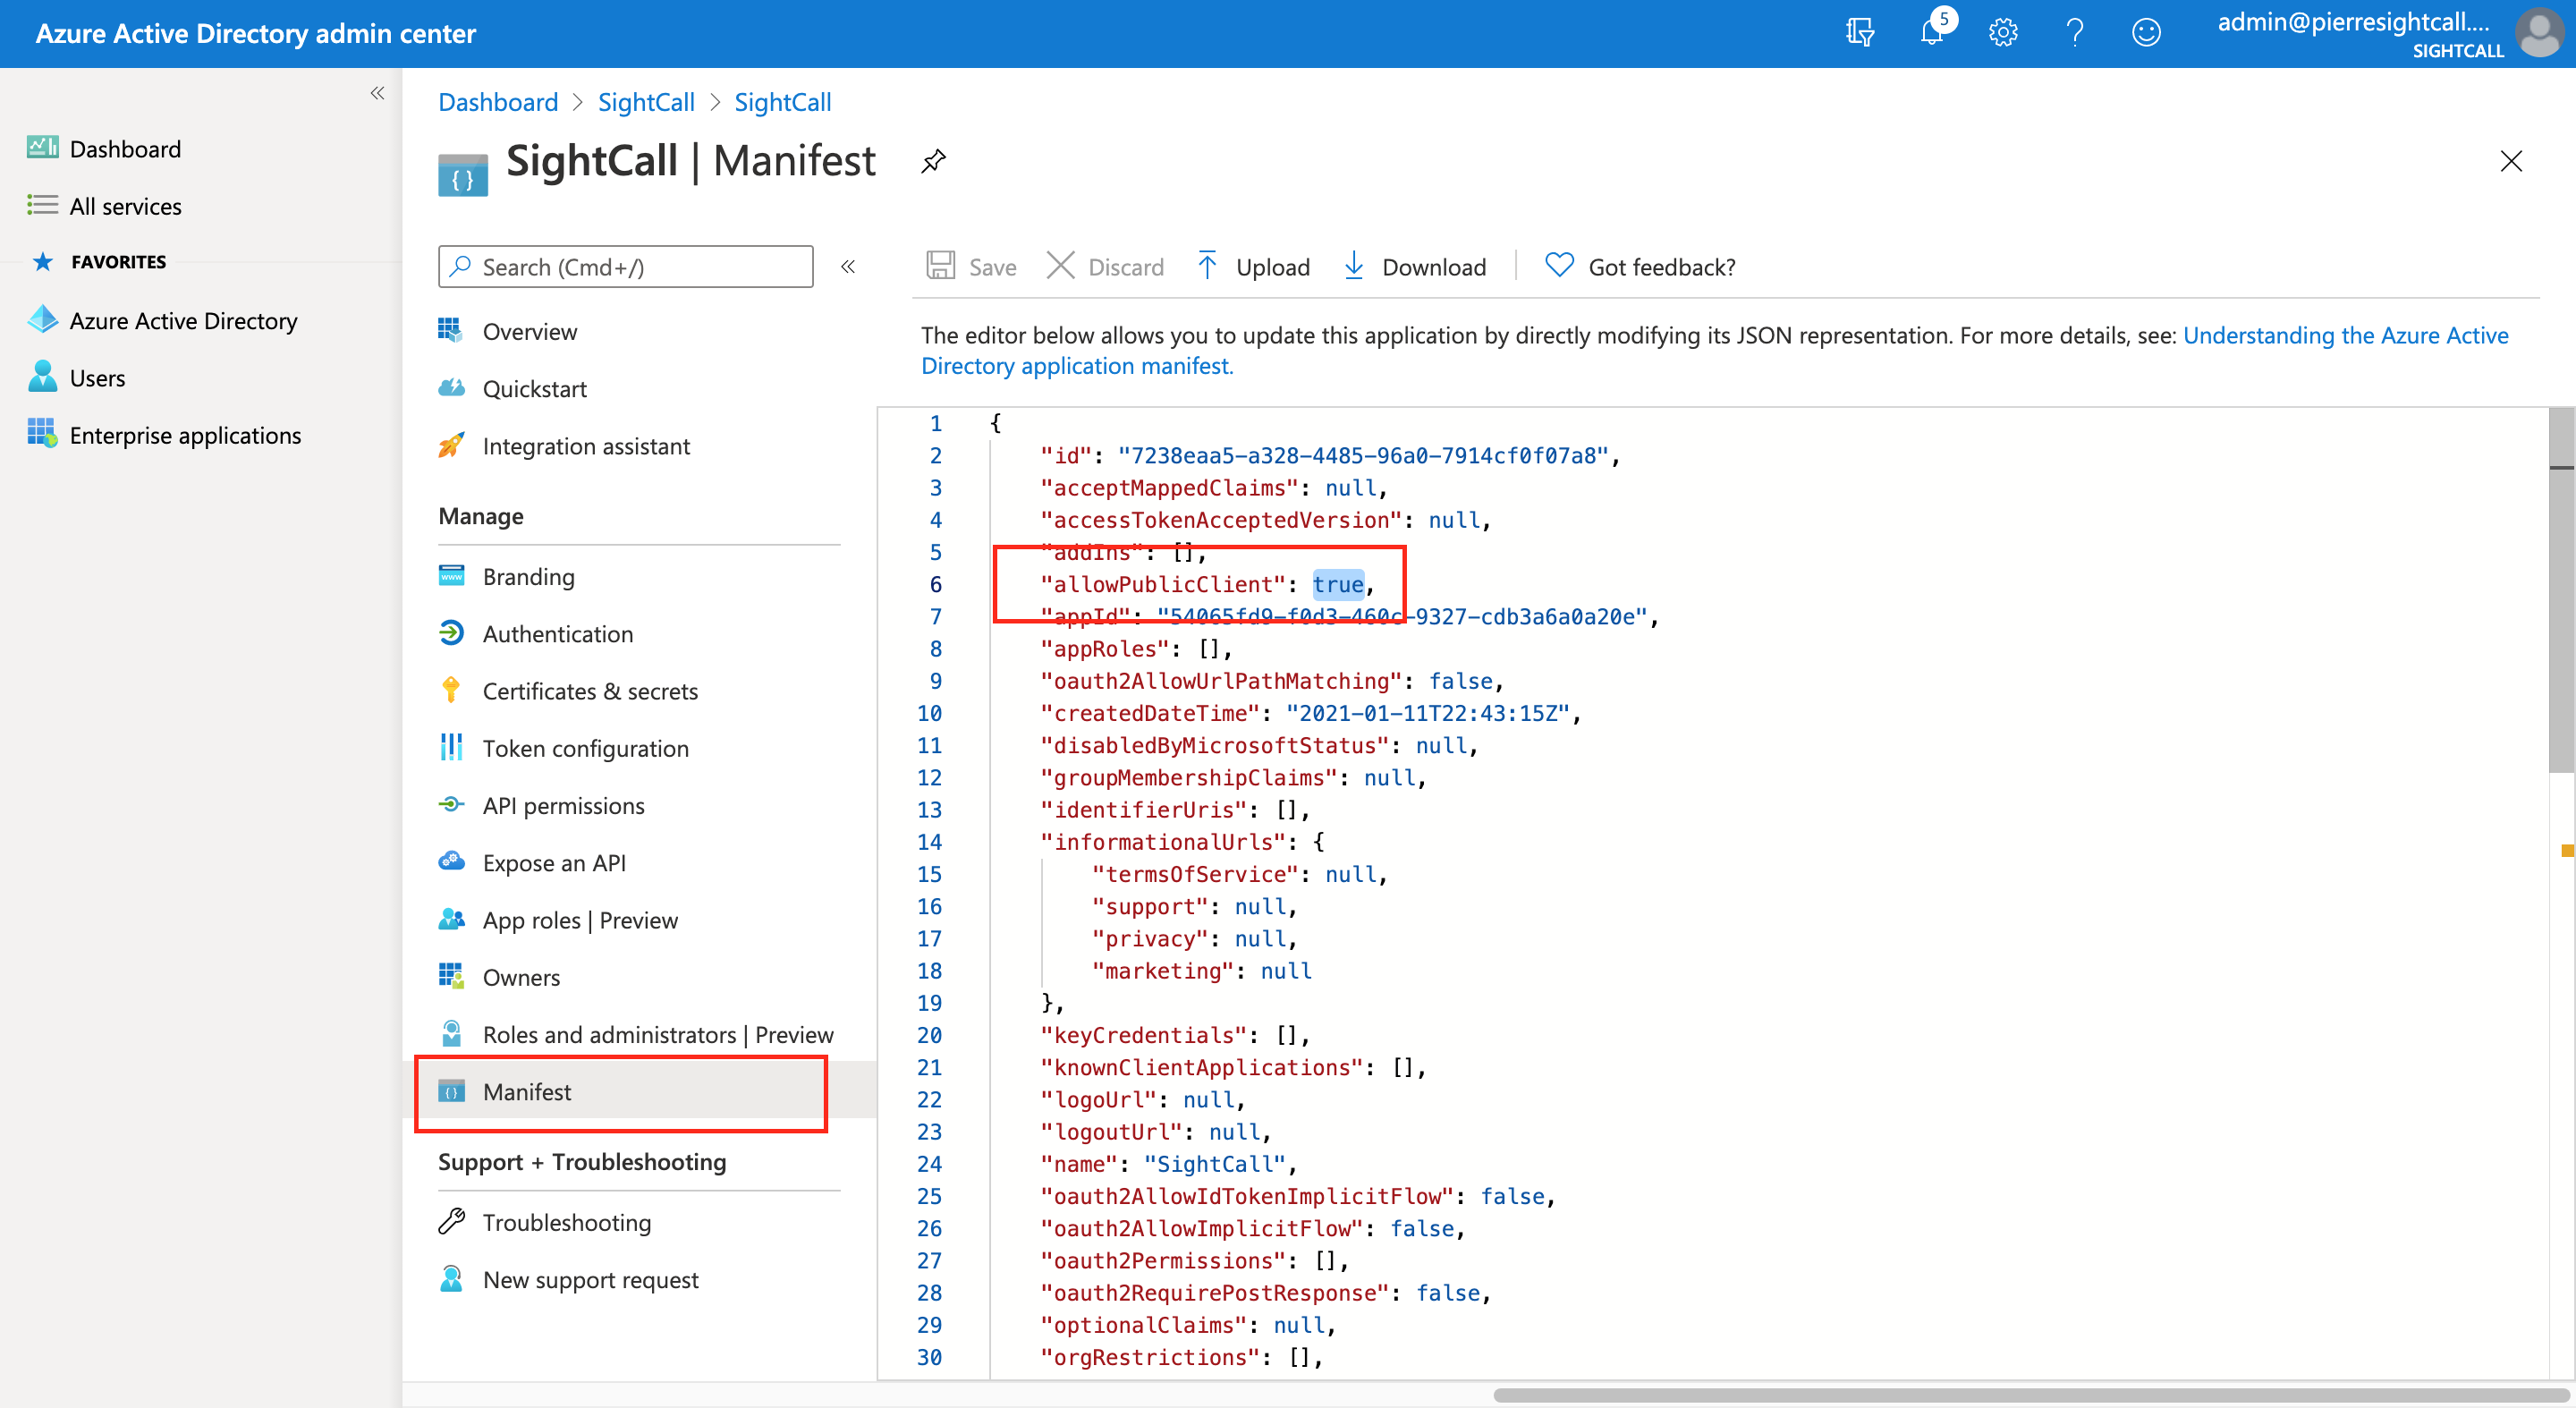
- Select Manifest and locate the allowPublicClient value to true instead of null. Select Save.
-
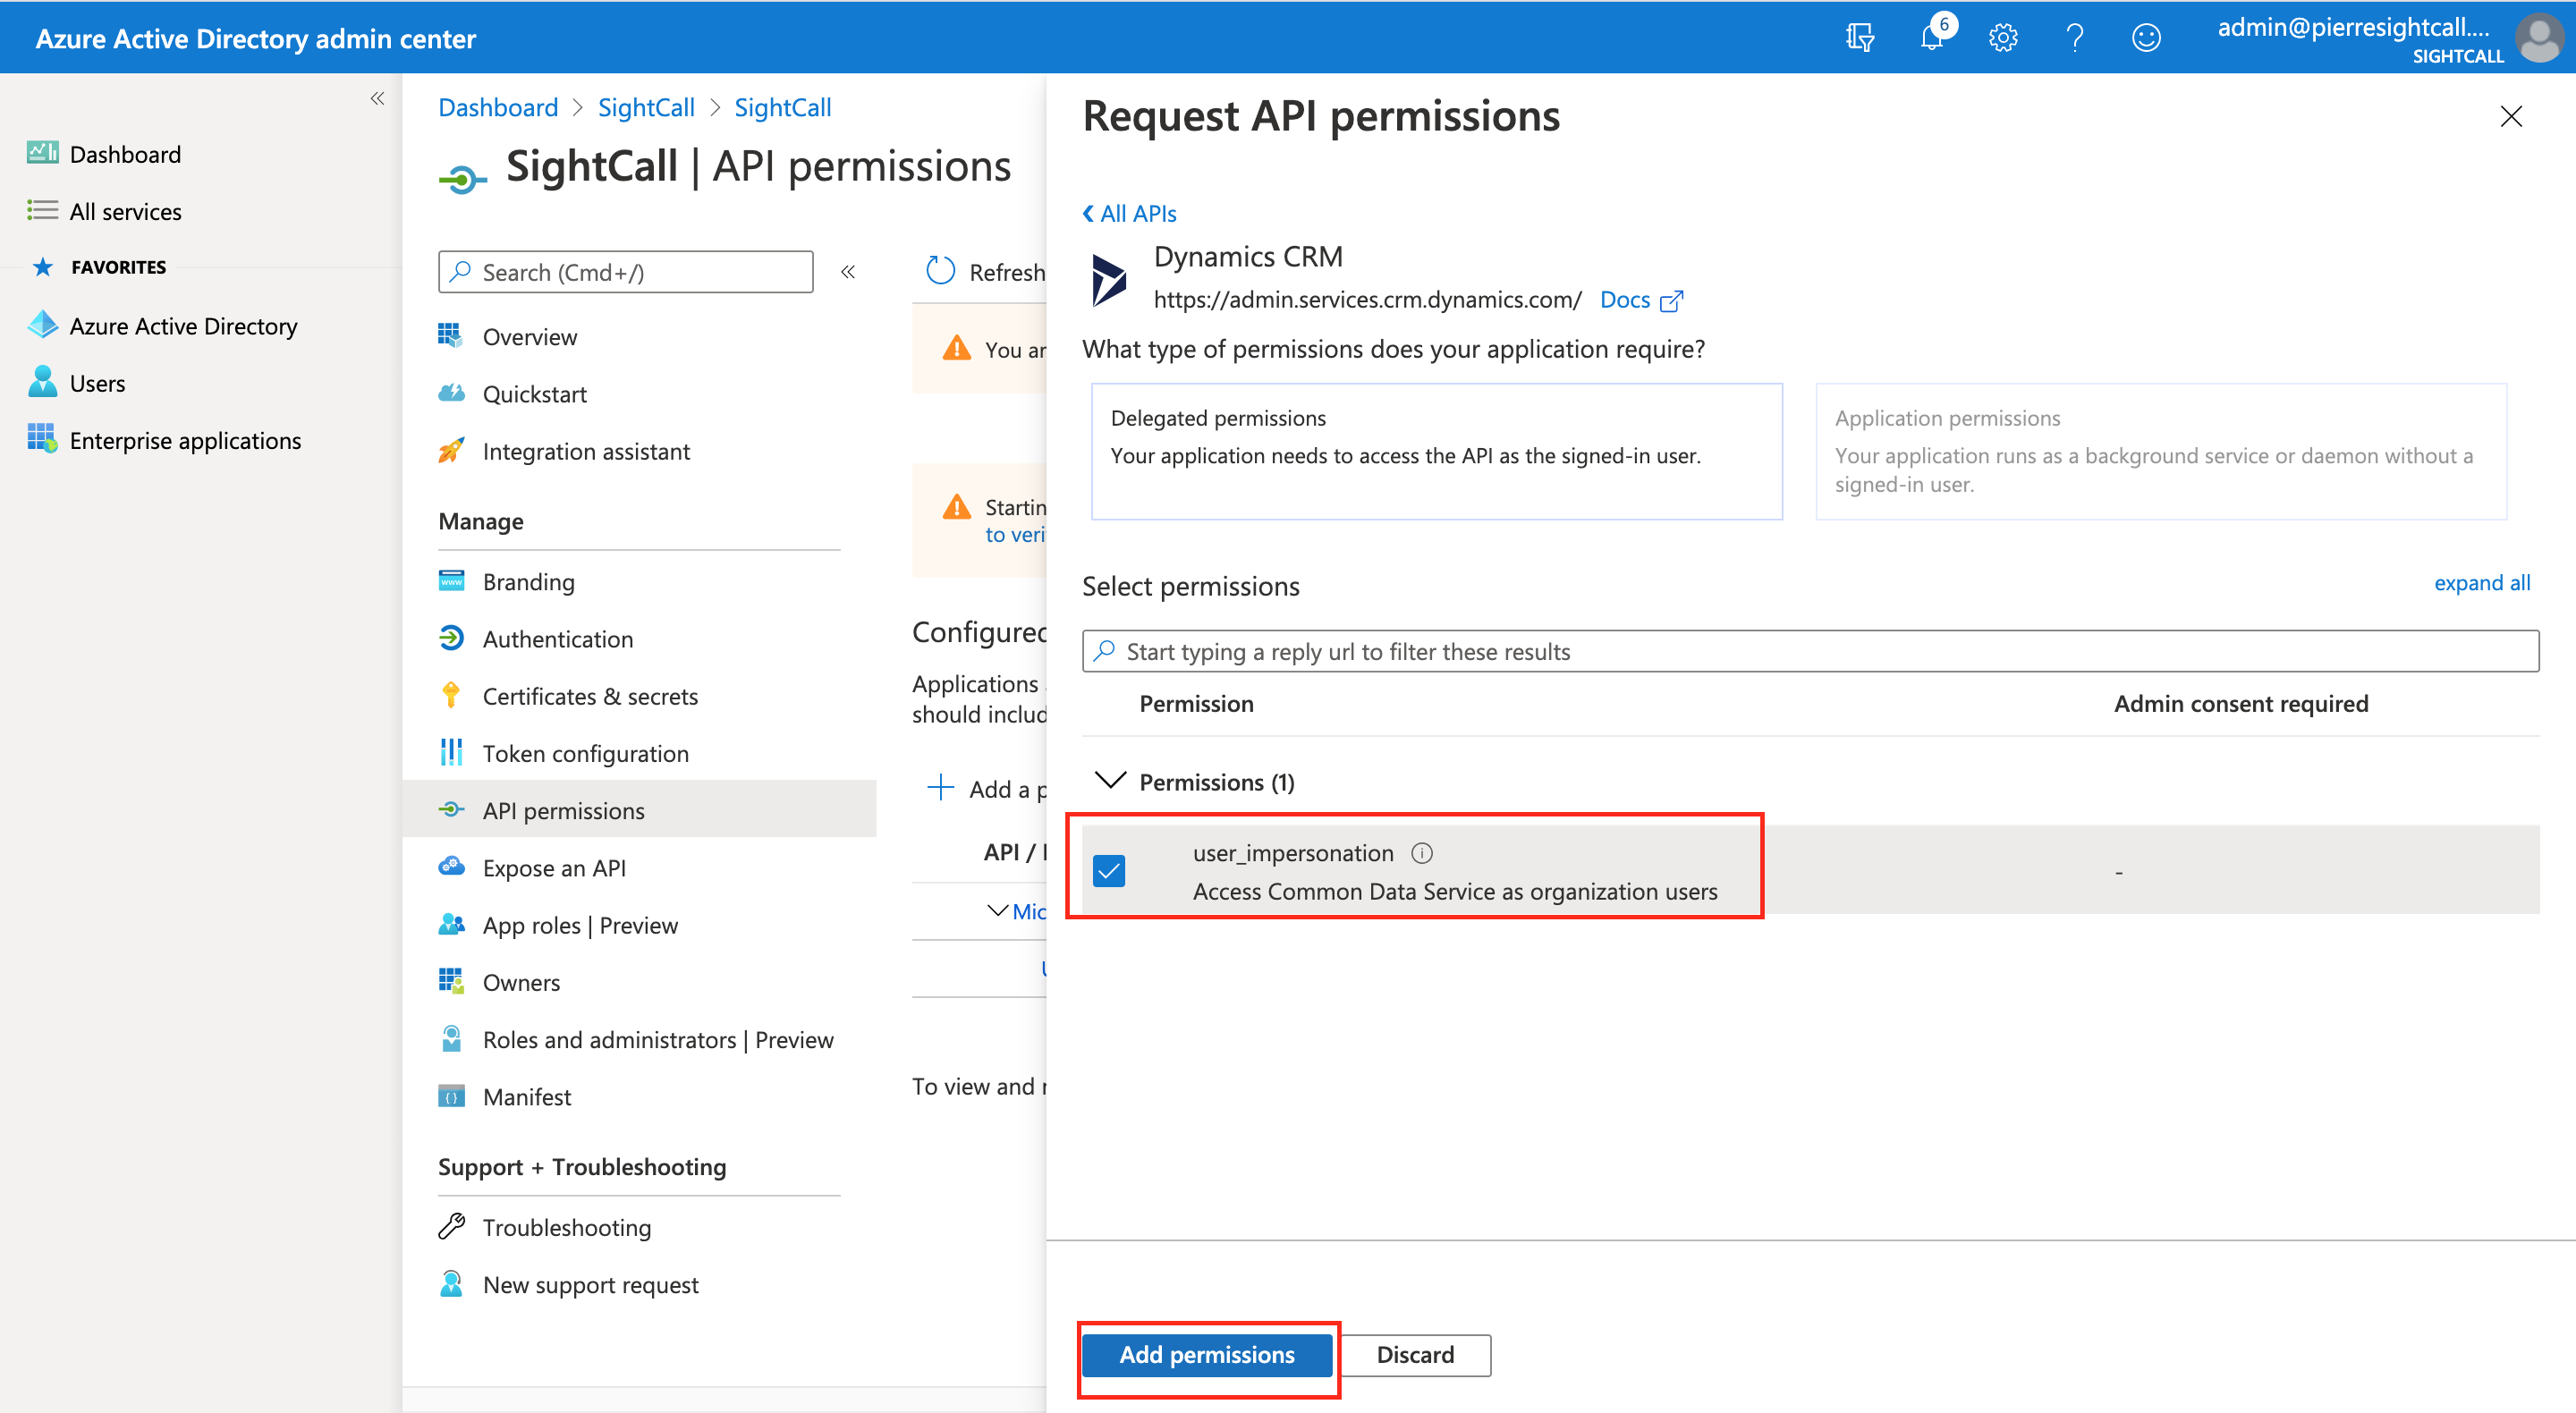
Select API permissions in the menu. Select Add a permission.

- Choose Application permissions and select APIs my organization uses. Search for Dataverse.
- Select Dynamics CRM. Select the checkbox next to user_impersonation permission and select Add permissions.
Create certificates and secrets for the app
- Click on Certificates & secrets in the left navigation and select New client secret.
- Add a Description for the secret and an expiration time frame. Select Add.
- Copy the value of the secret using the Copy to Clipboard icon. This will be used in the SightCall activation on microsoft.sightcall.com.

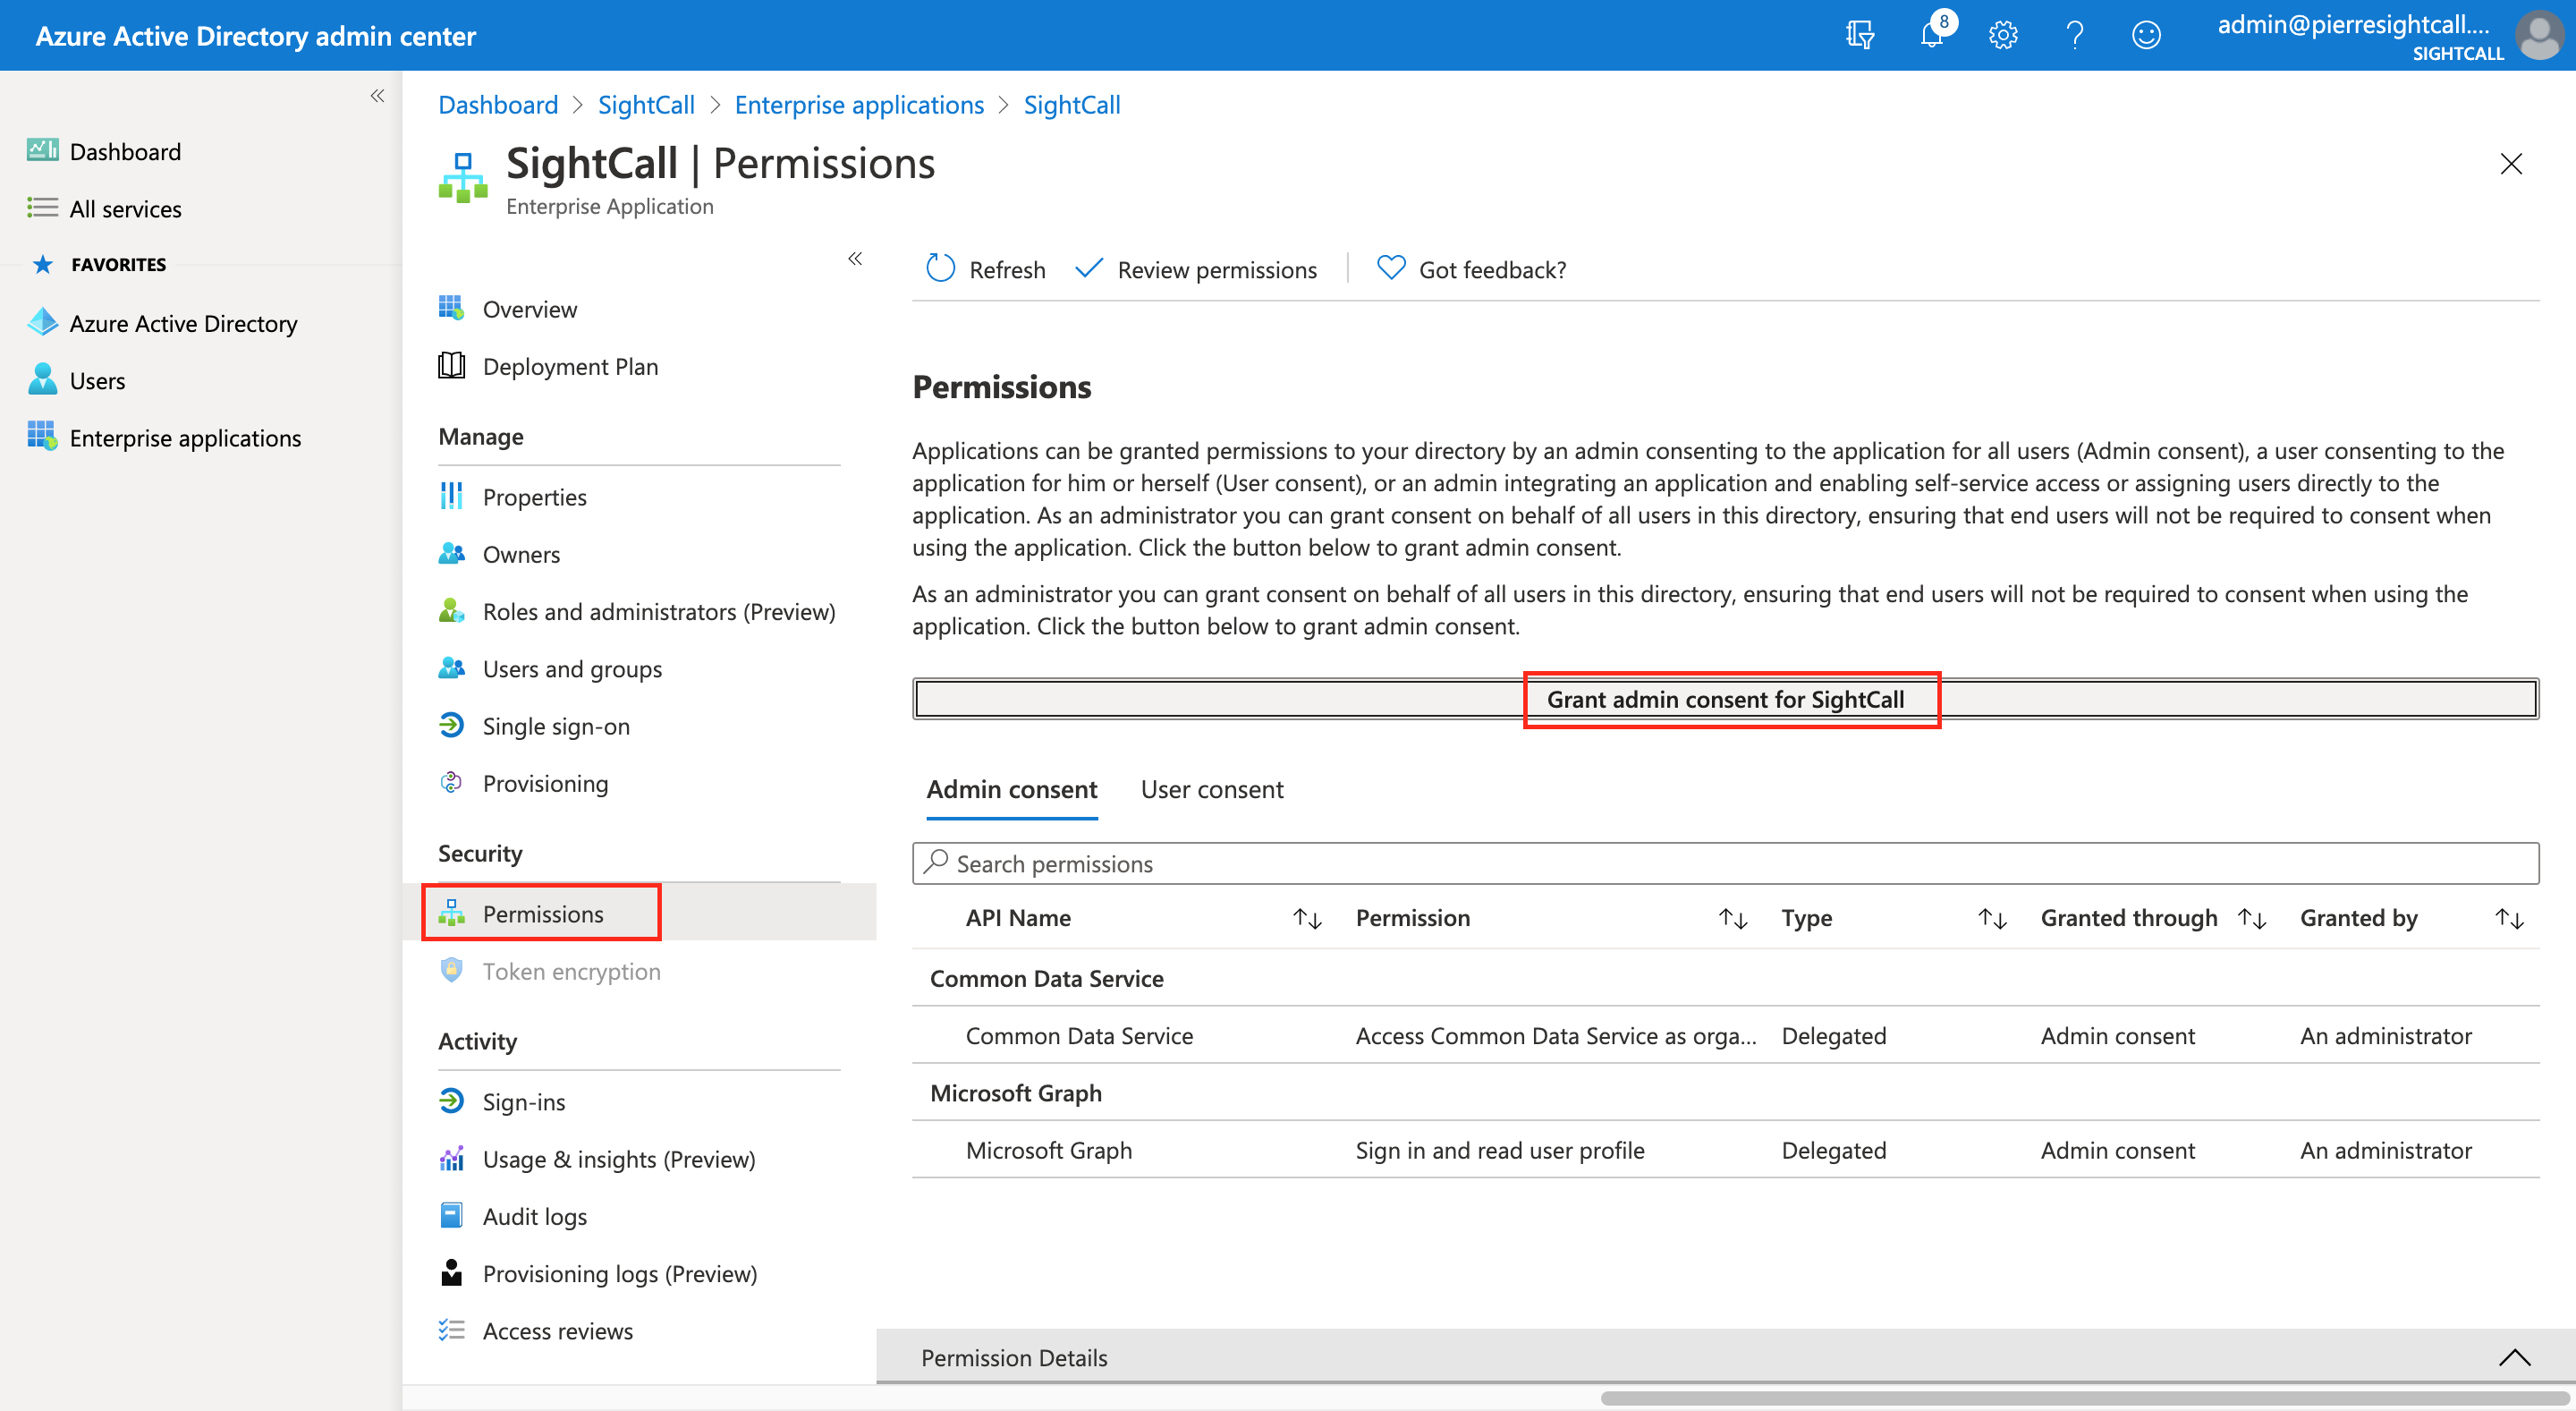
Grant admin consent for SightCall enterprise application
- Open the SightCall enterprise application by selecting Azure Active Directory > All applications > SightCall.
- Select Permissions in the left navigation.
- Select Grand admin consent for SightCall.